1.注册模块
新建文件:/app/code/Depyou/Catalog/registration.php 内容如下:
<?php
\Magento\Framework\Component\ComponentRegistrar::register(
    \Magento\Framework\Component\ComponentRegistrar::MODULE,
    'Depyou_Catalog',
    __DIR__
);
新建文件:app/code/Depyou/Catalog/etc/module.xml 内容如下:
<?xml version="1.0" ?>
<config xmlns:xsi="http://www.w3.org/2001/XMLSchema-instance" xsi:noNamespaceSchemaLocation="urn:magento:framework:Module/etc/module.xsd">
<module name="Depyou_Catalog" setup_version="1.0.0">
<sequence>
<module name="Magento_Catalog"/>
</sequence>
</module>
</config>
2.数据库字段添加
新建文件:app/code/Depyou/Catalog/SetupInstallData.php 内容如下:
<?php
namespace Depyou\Catalog\Setup;
use Magento\Framework\Setup\InstallDataInterface;
use Magento\Framework\Setup\ModuleContextInterface;
use Magento\Framework\Setup\ModuleDataSetupInterface;
use Magento\Eav\Setup\EavSetupFactory;
class InstallData implements InstallDataInterface
{
private $eavSetupFactory;
public function __construct(EavSetupFactory $eavSetupFactory)
{
$this->eavSetupFactory = $eavSetupFactory;
}
public function install(
ModuleDataSetupInterface $setup,
ModuleContextInterface $context
)
{
$eavSetup = $this->eavSetupFactory->create(['setup' => $setup]);
$eavSetup->addAttribute(
\Magento\Catalog\Model\Category::ENTITY,
'custom_attribute',
[
'type' => 'varchar',
'label' => '测试',
'input' => 'text',
'sort_order' => 100,
'source' => '',
'global' => 1,
'visible' => true,
'required' => false,
'user_defined' => false,
'default' => null,
'group' => '',
'backend' => ''
]
);
}
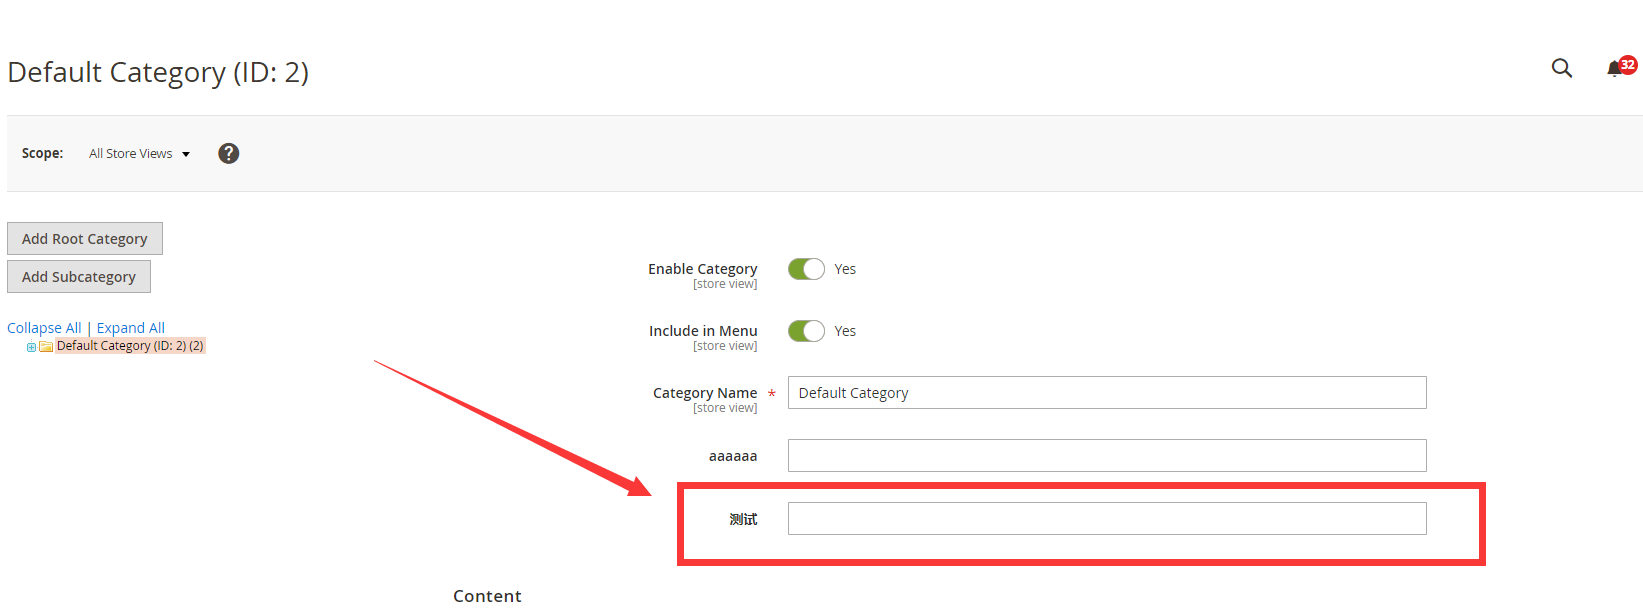
}3.后台前端内容添加
新建文件:app/code/Depyou/Catalog/view/adminhtml/ui_component/category_form.xml 内容如下:
<?xml version="1.0" ?>
<form xmlns:xsi="http://www.w3.org/2001/XMLSchema-instance" xsi:noNamespaceSchemaLocation="urn:magento:module:Magento_Ui:etc/ui_configuration.xsd">
    <fieldset name="general">
        <field name="custom_attribute">
            <argument name="data" xsi:type="array">
                <item name="config" xsi:type="array">
                    <item name="required" xsi:type="boolean">false</item>
                    <item name="validation" xsi:type="array">
                        <item name="required-entry" xsi:type="boolean">false</item>
                    </item>
                    <item name="sortOrder" xsi:type="number">333</item>
                    <item name="dataType" xsi:type="string">string</item>
                    <item name="formElement" xsi:type="string">input</item>
                    <item name="label" translate="true" xsi:type="string">测试</item>
                </item>
            </argument>
        </field>
    </fieldset>
</form>
4.更新
shell命令 cd进入网站主目录。
然后执行以下命令,最好以所有者身份执行。
比如你的网站目录所有者为www,那先切换到www用户。
切换用户命令:su www
php bin/magento setup:upgrade
php bin/magento setup:static-content:deploy -f
php bin/magento cache:clean
进入后台检查
5.前台调用
$category = $block->getCurrentCategory();
echo $category->getData()['custom_attribute']; //或者下面的方法
echo $category->getCustomAttribute('custom_attribute')->getValue();